Click below to navigate to a certain section:
- Adding Your Scripts
- Build Your Team
- Setting Up Your Widget Appearance
- Data Privacy/Legal Statement (Optional)
- Add User Segments and Feeds
- Test your One to One experience
- Additional Optional Settings to Configure
1. Adding Your Scripts:
- Within your One-to-One Workspace, navigate to Settings.
- Click on Appearance then Integrations, then select your Embed Script.

For detailed walkthroughs, see here:
- Implementing the One-to-One Virtual Shopping Script - For a Custom developed Site, Follow these instructions.
- Implementing the One-to-One Virtual Shopping on Shopify - Follow these instructions.
- Implementing the One-to-One Virtual Shopping on WooCommerce - Follow these instructions.
- Implement the One-to-One Virtual Shopping tracking - Follow these instructions.
Have a developer team and are looking for customizable options with the widget or other integration alternatives? Follow our developer documentation here.
2. Build Your Team:
Who will be responding to the visitor's request?
- Add agents via Business portal (Admin or Member access) to then invite via email to sign in for One-to-One Workspace. Follow instructions here.
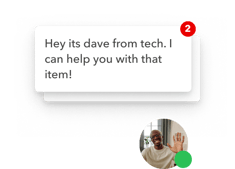
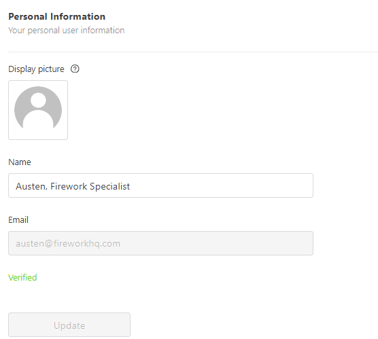
- In the business portal, access your “profile”. Agents can add their image here which appear on a new message (240x240 pixels). Access your profile here: https://business.firework.com/profile
3. Setting Up Your Widget Appearance
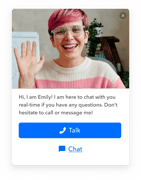
Prior to a Visitor calling in or requesting a call, you can display a GIF of a Sales Agent or an avatar of available agents to be displayed in the preview.
-
Start by navigating to Settings → Appearance → Configuration. Here, you’ll find an option to upload an animated GIF that appears in the widget interface. For best results, use a 5:7 format, with a minimum resolution of 625x875 pixels, and ensure the GIF runs for at least 3 seconds. Additionally, make sure the main subject is centered with minimal white space around it to maintain visual balance. You can preview the widget to see how it looks before saving your changes.

- Finally, scroll down to the bottom and insert the Widget cover text and Widget menu text.
- Widget cover text = the text shown on the widget when not clicked. For example: "Shop with us", “Talk to an expert”, "Start a conversation".

- Widget menu title = the title displayed on the widget when clicked. For example: “Chat with one of our experts with text or one-way video call! Don’t worry your camera will be off, we will not see you”.
- Widget description= the text below the title that gives a description for the title
- You can also upload a Hero Image to accompany the opened widget (recommended size: 720x500px), adding a visual element to further align with your brand identity.
- Widget cover text = the text shown on the widget when not clicked. For example: "Shop with us", “Talk to an expert”, "Start a conversation".
Avatar Display of Agents
- Within your One-to-One Workspace , click Settings.
- Navigate down to Avatar. Select the widget size, cover, menu title and description then select save.
Tips:
- Try to use a gif that is not constantly waving or moving, as it might distract the visitor too much from their browsing experience.
- Ensure the image is centered with less white space surrounding this, as shown below.

Widget Positioning
Select a corner of your screen where you would like the video widget to be anchored. By default, the widget is positioned in the bottom right corner, but you can adjust its placement and modify the bottom padding as needed.
4. Data Privacy/Legal Statement and Lead Capture
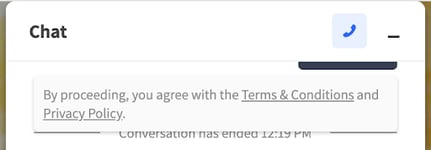
You can provide a legal statement along with any URL(s) of the item listed below for visitors to review/agree to before engaging in a call or chat. This will appear at the top of the chat window.
-
- Privacy Policy
- Terms and Conditions

For Example:
Lead capture : Enable this option if you would like to capture leads. When activated, visitors will need to provide their name and email address before submitting a request. This information can be integrated with third-party platforms using the Zapier integration.
5. Add User Segments and Feeds
User segments help define visitors within the Feeds for your Agents to monitor and interact with. This is useful when looking to segment shoppers by a certain requirement or category.
Requires Admin access to set up.
- Within your One-to-One Workspace, navigate to Settings.
- Click into User Segments, then select Add Segment.
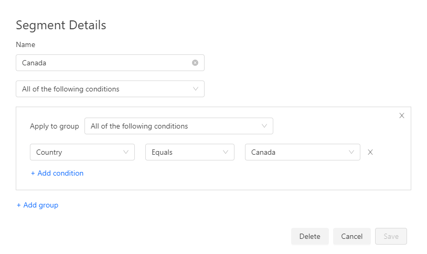
- Give this a name and choose from the options, URL or Country, to segment the visitors by. Additionally, you may choose to apply the group to all or any conditions.

- Fill out the third box, which serves as the Segment being searched for.
- You may also add more group options by selecting "+Add group". When finished, click Create.
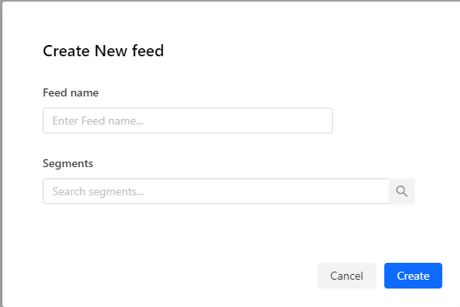
- Navigate to Feeds. Here you will see the current feeds active and non-active. Select Create Feed.
- Enter a name displayed internally for your feed and select the Segment you created. Then click Save.
You will have control of displaying this feed within your One-to-One Workspace by using the toggle. Agents can then subscribe directly to a feed relevant to them from their workspace.
Here are some examples when setting the Segments:
URL Segment

Country Segment
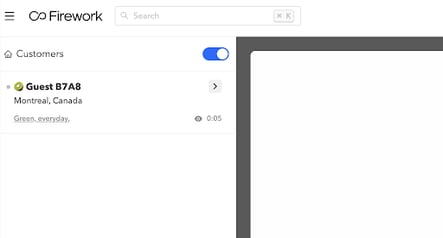
Test It
Once you have added your One-to-One script, toggle on the button next to “Customers” from the One-to-One Workspace to make your widget visible.
*We recommend testing a call with another Agent or internal employee for practice and to get the flow of navigating. Please reach out if you have other additional questions.

Additional Optional Settings to Configure:
Widget Availability
You have the ability to configure the availability of the widget, including defining the working hours for your agents. For comprehensive instructions, please refer to the provided link.
Widget Visibility:
Discover how to configure the visibility of your widget and understand where it will appear for your shoppers to access. - link
Widget Capacity
You may set a waitlist capacity per incoming conversation requests.
- From Settings, click into Appearance then Visibility.
- Toggle on Waitlist Capacity. For the "Condition", you may set a queue limit then choose from the following options once that limit is reached.

Scheduling:
If leveraging a callback software, insert your calendar scheduling URL for Agents to follow-up.
- From Settings, click into Appearance then Embed, then scroll all the way down.
- Under Scheduling, select "Custom landing page" then insert your URL per the scheduling link.
- Scheduling with Calendly : allows to schedule and manage meetings effortlessly with calendly making it easy for visitors to book and attend. Check out the details here

Camera Permission:
You can have control over camera settings if you want to allow customers the option to enable their camera on or off.
- From Settings, click into Appearance then Advanced, then scroll all the way down to "Camera Permission".
- You have the option to allow visitors to select if they can enable their camera on/off.
