
Digital Showroom provides an easy-to-use platform for sales associates to regularly interact with and sell to your customers online, bridging the gap between physical and digital storefronts and mobilizing your existing sales force.
Note: Must be enabled on your account, If you do not see this and are interested in using Digital Showroom, please reach out to your Account Manager.
Click below to jump to section:
- Invite Sales hosts
- Create a Digital Showroom
- Additional Optional Settings to Configure
- Add Products and Interactions to Your Digital Showroom:
1. Invite Sales Hosts
Admin Access needed in business portal to complete the below.
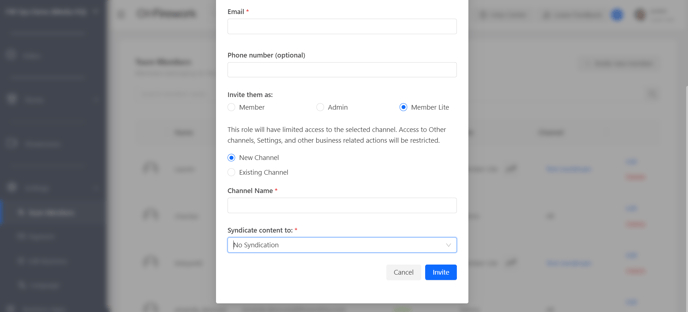
- From the Business Portal, select Settings, then Team Members, and click Invite New Team Member. Enter the Showroom Host’s Name and Email.
- Member = Can access and see all content to a Business Portal account. This option makes the most sense if you have an internal Host who also helps manage content (Videos, Livestreams, etc) within your Business Portal.
- Member Lite = Can only access a single channel in the business portal. This option makes the most sense if you want to prevent a Host from interacting with your brands content and only enter their Digital Showroom only.
- To do so, create a new Channel for this Host. Then select your original channel to syndicate their Showroom to.
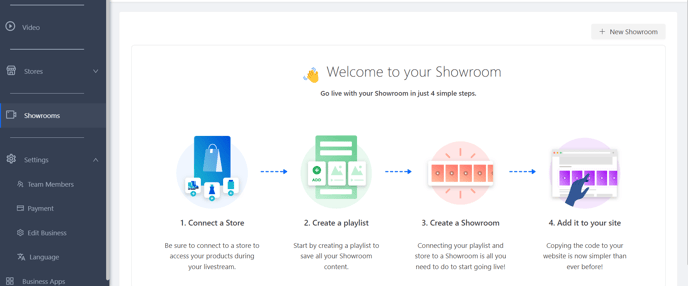
2. Create a Digital Showroom
Note: Only an Admin can create new Showrooms.
We also recommend you have a Playlist created prior for the Digital Showroom to appear.
- Select the Showrooms tab followed by + New Showroom.
- Enter the Showroom Title then select the Showroom Host.
- The Source Channel and Target Channel will automatically fill in based on how you set up the Member Lite contact, otherwise you may adjust to appropriate channels.
- Source Channel = is the Channel where the Showroom was created. In the case of Member Lite it will be their channel.
- Target Channel = is the channel you are syndicating content to.
- Select which Playlist(s) you want the Digital Showroom to be added to.
- Be sure that you embed the playlist on your site before going live in a Showroom so that the stream will automatically be live on your site when the Showroom Host goes live.
3. Additional Optional Settings to Configure
- Add a Description to differentiate between Showrooms in the Business Portal.
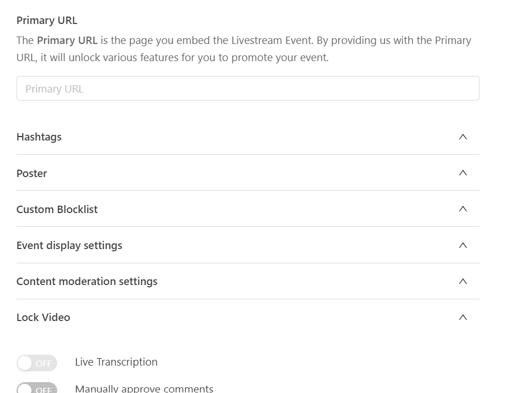
- Primary URL is not recommended but adds a primary URL to help direct your audience to a specific page that is different from where you embed the Playlist.
- Use Hashtags to help you filter videos within the Business Portal.
- Upload a Poster to give your audience an idea of what they will be seeing before the event begins.
- Enter words you want blocked from the stream in the Custom Blocklist section.
- This will be in addition to certain swear words that will automatically be blocked by default.
- Our suggestion is to add any competitor names or phrases you might not want in the stream.
- Control what your viewers will see on the event in the Event Display Settings.
- Our suggestion is to leave these to their "default On" setting.
- Lock Video to provide an access only code to share with users to view.
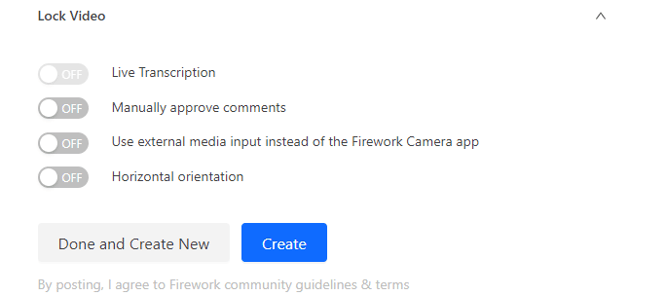
- Live Transcription will give your audience the option to toggle on subtitles.
- Manually Approve Comments will force the moderator to manually approve each comment that comes into the Showroom before posting.
- Our suggestion is to leave this toggle off.
- Select Use external media input instead of the Firework Camera app if you are not using the Firework Camera App to go live.
- Horizontal Orientation allows the view to be horizontal instead of vertical. Note that only external media can be used for this option.
- Select Done and Create New to finish creating the Showroom and immediately begin creating a new one.
- Use this if you want to create multiple different Showrooms at one time.
- Select Create to finish creating the Showroom.
- Use this to create the Showroom and move to the next step which is adding products and interactions.
Add Products and Interactions to Your Digital Showroom:
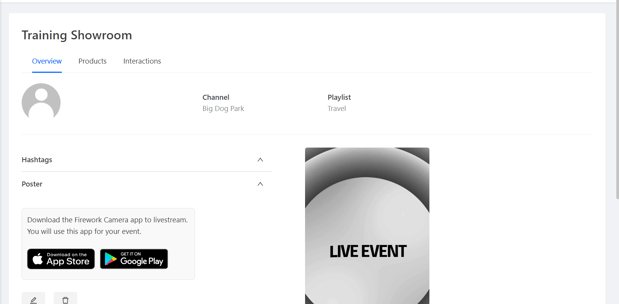
- After you create the Showroom, you will be met by the Digital Showroom Overview page where you can add products, interactions, hashtags to help you filter videos in the Business Portal, and a Poster if you forgot to add it during the creation of the Showroom.
- Products & Interactions:
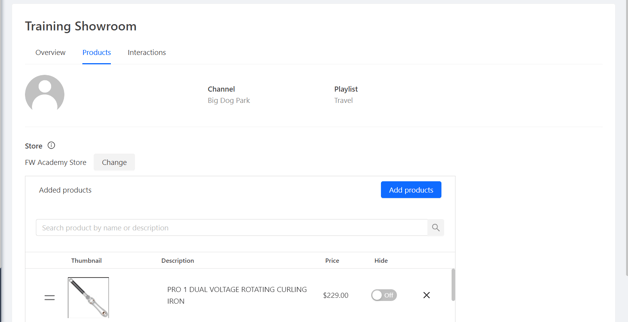
- Select the Products tab and add products from your store into the Virtual Showroom.
- Select the Interactions tab and add Questions/Polls to your Virtual Showroom.
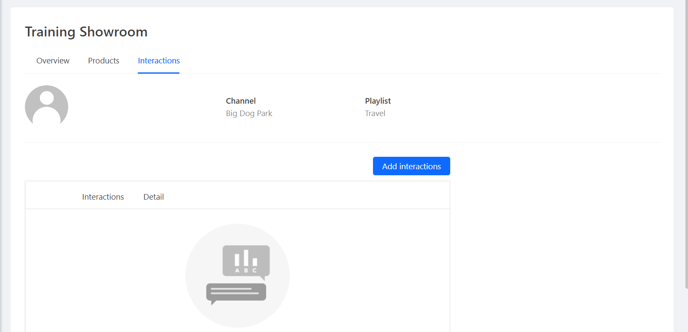
- Question cards can be used to collect the emails of the viewers that are responding to the questions. After the audience responds to the question, they will have to enter their email address
- Polls can be used to help understand what your clients are looking for in a product
- Giveaways can be used to increase viewership and engagement with your audience.