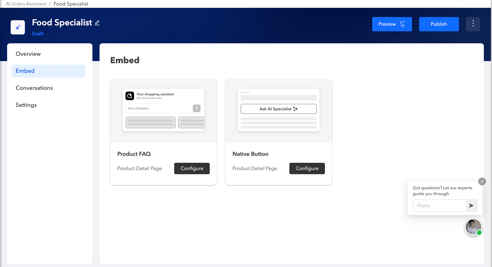
Step 1: Selecting AVA to Embed
-
Navigate to the AVA you want to embed.
-
Click on the Embed option located on the left side of the screen.
-
You will see two primary display options for AVA:
-
Product FAQ Display
-
Native Button Display
-
Step 2: Product FAQ Display
The Product FAQ Display allows you to embed AVA as native, interactive content. Visitors can chat or ask questions directly from your website.
Content Configuration
-
Title & Subtitle: Edit the title and subtitle of the widget.
-
AI Icon: Toggle on/off to display the AI icon.
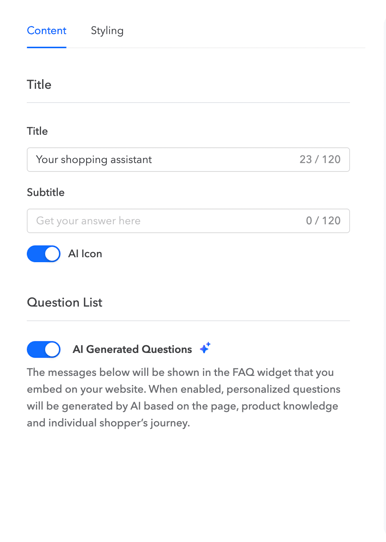
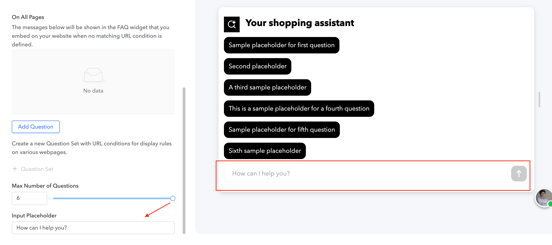
Questions List
-
Enable AI-Generated Questions:
-
AVA automatically generates personalized questions based on page content, product data, and visitor behavior.
-
If AI is disabled, default questions you define will be displayed.
-
-
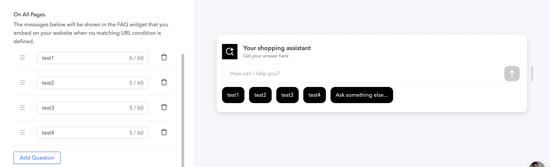
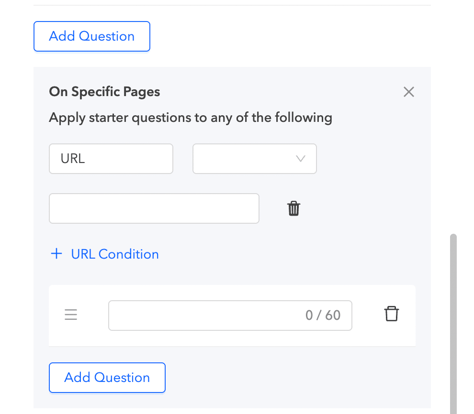
Add FAQ Questions:
-
Add up to 6 questions, each up to 60 characters.
-
Provides quick answers and navigation support.
-
-
Additional Question Sets:
-
Create URL-specific question sets to display different starter questions on different pages.
-
Click +Question Set to add more.
-
-
Input Placeholder: Customize the text displayed in the input field.
-
Save Changes: Click Save once configuration is complete.
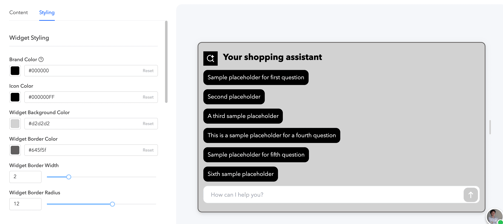
Styling the FAQ Widget
-
Brand Color: Set the base color for your brand.
-
Icon Color: Customize the color of icons.
-
Widget Background & Border:
-
Adjust background color, border color, width, and radius.
-
-
Title Styling: Customize text color, size and weight.

-
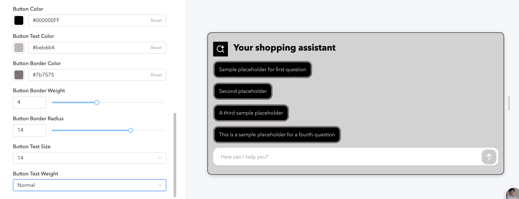
Button Styling:
-
Customize button color, button text color, border color, border width, radius, text size, and weight (normal, light, bold).
-
-
Layout & Alignment:
-
Align widget: Left, Center, or Right
-
Assistant popup placement: Bottom-left, Center, Right
-
Button orientation: Stacked, Horizontal, Responsive

-
-
Embed Code: Click Embed Code to copy the code and use it on your website.
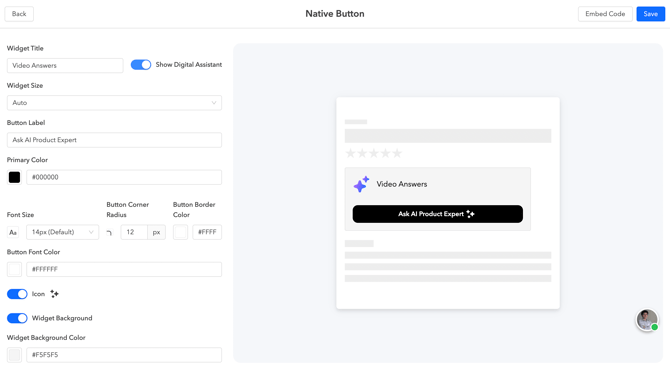
Step 3: Native Button Display
The Native Button Display allows you to embed AVA as a CTA button on your website.
-
Widget Title – Add a title for your widget.
-
Show Digital Assistant – Toggle on/off to display the assistant in the widget.
-
Widget Size – Choose between Auto or Custom. Selecting Custom lets you manually set the widget’s dimensions.
-
Button Label – Define the text displayed on the CTA button.
-
Primary Button Color – Set the main color of the button.
-
Button Border Color – Choose the color of the button border.
-
Button Font Color – Select the color for the button text.
-
Use AI Icon – Toggle on/off to display an AI icon on the button.
-
Widget Background – Toggle on to customize background settings:
-
Edit background color
-
Adjust border thickness
-
Set corner radius
-
Choose border color
-
- Click on "Embed Code" to copy and paste the widget code into your website.